- Â
å Monday, February 26th, 2018
B “History” functionality in Rhino
We didn’t look at this in class, but the “History” functionality in Rhino could be very useful as you are work on building the three bentwood chairs. This functionality will link input and output geometry. In other words, it can connect a curve (input geometry) with a pipe (output geometry) so that if the input curve is manipulated, the resulting output surface will follow this change.
More information here:
http://docs.mcneel.com/rhino/5/help/en-us/commands/history.htm
( Commenting in Google Docs
Part of the homework is to comment on someone else’s project. There are several ways to do this, but all start with opening the google doc you want to comment on (duh):
- select the text you wish to comment on
- go to Insert>Comment (you can also use the shortcut command+alt+M on Mac, or ctrl+alt+M on Windows)
- type your comment into the field that appears
- click on the comment button
or
- float the cursor along the right edge of the page near the section you want to comment on until an icon of a talk bubble with a document in it
- click on this button
- type your comment into the field that appears
- click on the comment button
As reminder, you are supposed to comment on the person whose last name is after your’s alphabetically (this exercise is for your benefit, so no need to comment on my post – it’s not included in this list). The last person in the order should comment on the first person. Here is a list of the class’s last names:
- Attias
- Barthel
- Bell
- Blum
- Chen
- Do
- Emy
- Gerasimoff
- Gillman
- Gutbrod
- Herrera Matiz
- Hetfield
- Humphrey
- Hutchinson
- Kusaba
- Li
- Mitrovic
- Robertson
- Rower
- Sherpa
- Silver
- Valenti
- Venegas
- Warren

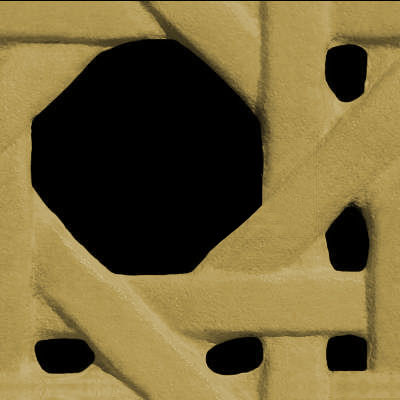
B Chair Cane and Wood Texture
Here are two images that can be used to simulate a caned surface as was demonstrated in class.
![]()
A basic review of how to do this:
- Assign the objects you want to have this texture with a “Matte Paint” material with any color (other materials will work as well, but this is a good start)
- Find this material in the list of in-use materials from the materials inspector, double click on it
- Click on the “Textures” Tab
- Assign the black and tan image to the “Color” texture option
- Assign the black and white image to the “Opacity” texture option
- Make sure the option for “sync” is turned on from the bottom of the textures properties
- Adjust the scale as needed with the slider or by entering a number in the field associated with the scale slider
And here are a few wood textures you can use.
í Assignment 2
1. Comment on Someone else’s project
A. Due March 2
In response to their work on the drinking glasses part of Assignment 1, write a very brief statement commenting on the work of the classmate whose last name follows your alphabetically (the last person in this order should comment on the first person). Describe at least one positive and one negative aspect of their design, but also make specific suggestions for how their renderings can be improved. This comment is required, but you are also welcome and encouraged to comment on anyone’s work. Use Google Doc’s commenting feature to do this.
2. Improve Your Post for Assignment 1
Due March 5
If your post from the first assignment had any problems, or if suggestions were made that could improve your design or rendering, you have the chance to go back and make improvements. Technically this is not required, but the improved submission will be considered for grading purposes, should you choose to revise. If you choose to improve your work, modify your document, adding the new content so we can see the improvements in relation to the original content. Don’t delete the original work.
3. 3D Print one of your glasses
Due March 12
Select one of your glasses to make a 3D print of. Save your this model as an STL and submit it for printing on one of the 3D printers in the Bank Building second floor.
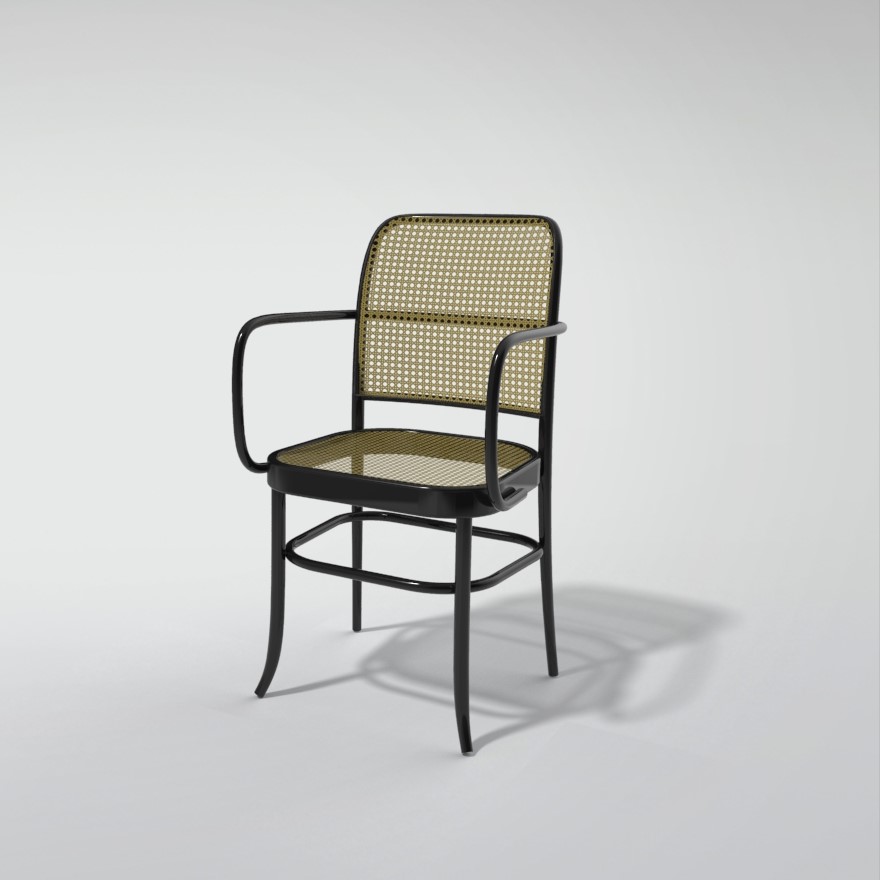
4. Chair Study: Models and Rendering.
Due March 5
Working from the brief for the Chair Study project, you should create the following content:
Rhino File
- Build a model of each chair.
- Begin by drawing 3D curves that faithfully capture the proportions and scale of the chairs.
- Most of the bentwood components should be built with the pipe tool, with the majority of remaining surfaces built as extrusions or surfaces from planar curves (“planarsrf” command).
- Build all chairs in a single Rhino file.
- Place each chair on its own set of layers
- Use nesting layers to organize the parts of the chair
- Build each chair to have a consistent relationship with the origin (if one is centered over the origin, make all of them centered, for example)
- Keep all important curves on layers to facilitate organization, management, and editing
Put your Rhino folder in your personal Google Drive folder. Begin to organize your folder with sub folders for each project so faculty can easily navigate and find your work.
Rendering
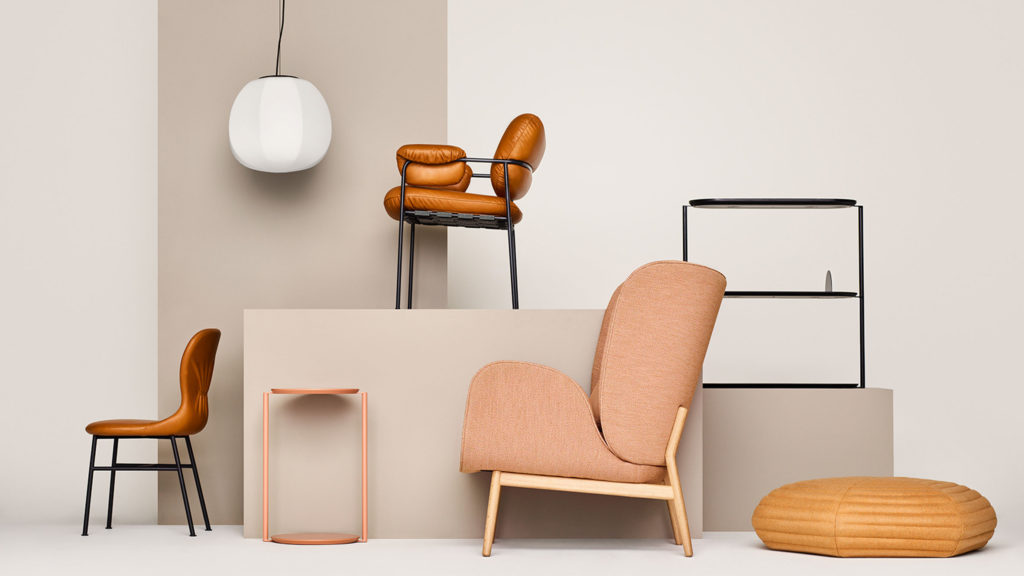
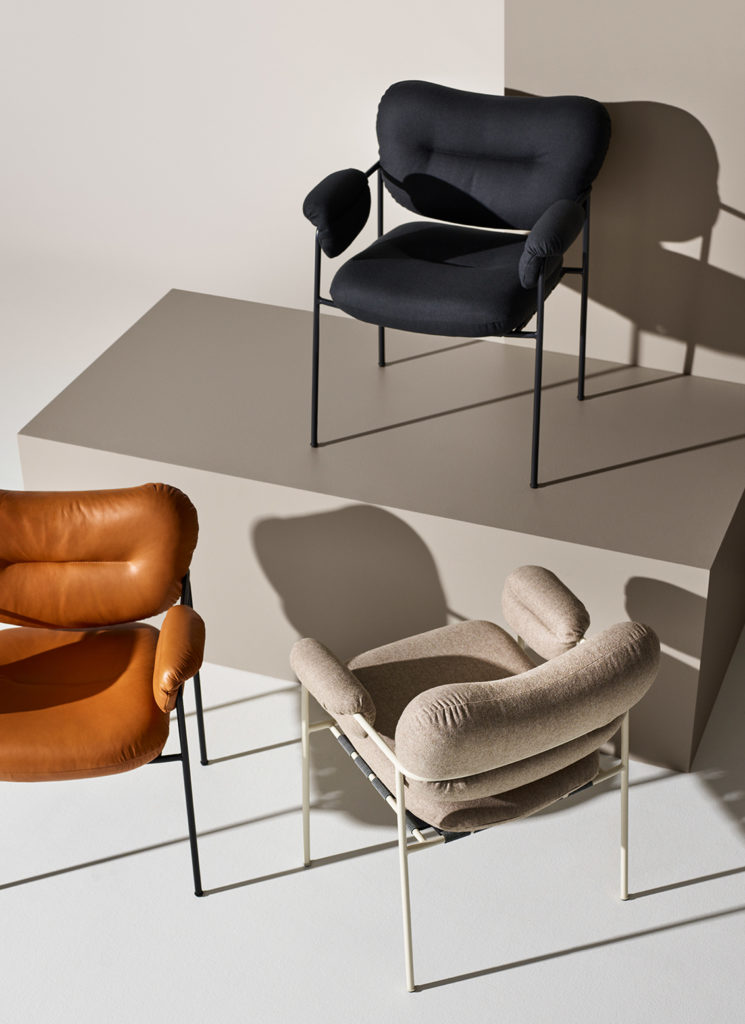
- Build a scene in Rhino using basic “pedestal” elements (extrusions) as props for your chair models to provide an interesting backdrop to render within. Create at least three renderings using this scene: at least one that shows all three chairs in their entirety, and at least one that has the chair closest to the camera partially cropped.
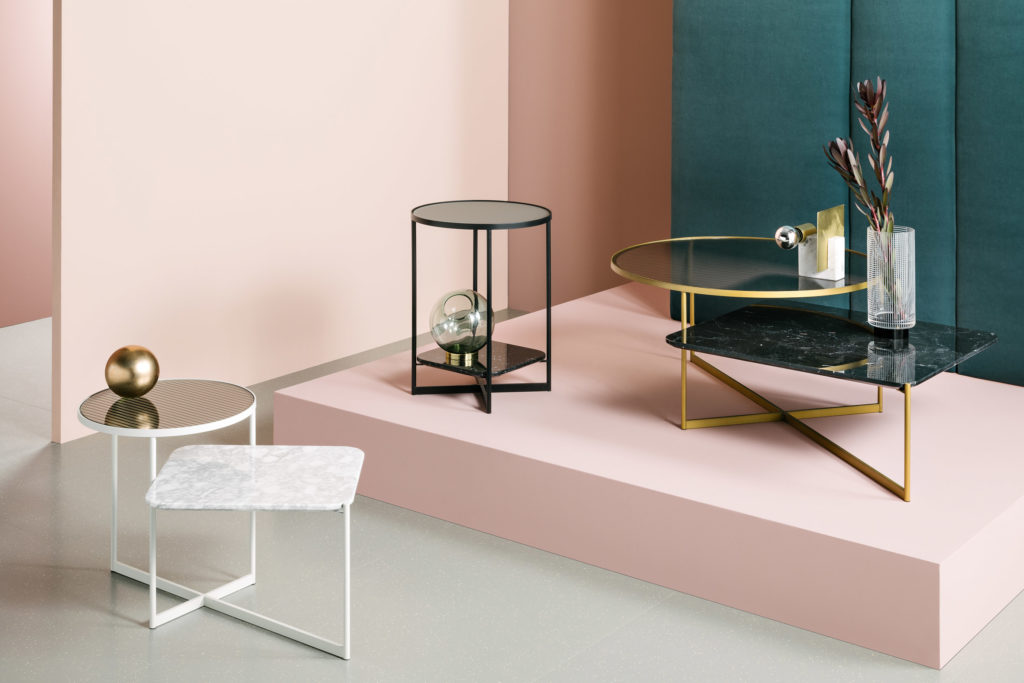
- Choose at least two images from this post on Dezeen and use these images as backdrops to create renderings that show your chair models in the spaces. These renderings must include at least one of your chairs, but can also include more than one instance of each chair or chairs.
- Bonus: Create a surreal or fantastic scene using a backdrop image that places your chair in a setting that is somehow surreal, unexpected, or otherwise out of the ordinary
- All renderings should be submitted at 1,200 pixels wide, and at least one renderings from each series should use wood (without opaque finish, so the grain is visible) as the material
Put your renderings in your personal google drive folder and the “chair rendering folder”. Come up with a consistent, logical naming convention that begins with your first name and clearly differentiates between the three series of renderings. Use this for all of your renderings. For example: Specce_Chair_Scene1.jpg, Specce_Chair_Interior1.jpg, Specce_Chair_Surreal.jpg
5. Paper Model Selections
Select and bring in several objects for consideration to use in the next project, Paper Model.
( Rhino 6 import to Keyshot issues
If you are using windows and installed Rhino 6, Keyshot will not recognize a Rhino 6 .3dm file. To work around this, save your rhino file as a version 5 file. Keyshot will most likely be updated to work with Rhino 6 shortly. In the meantime, the Keyshot plugin for Rhino works between Rhino 6 and Keyshot.
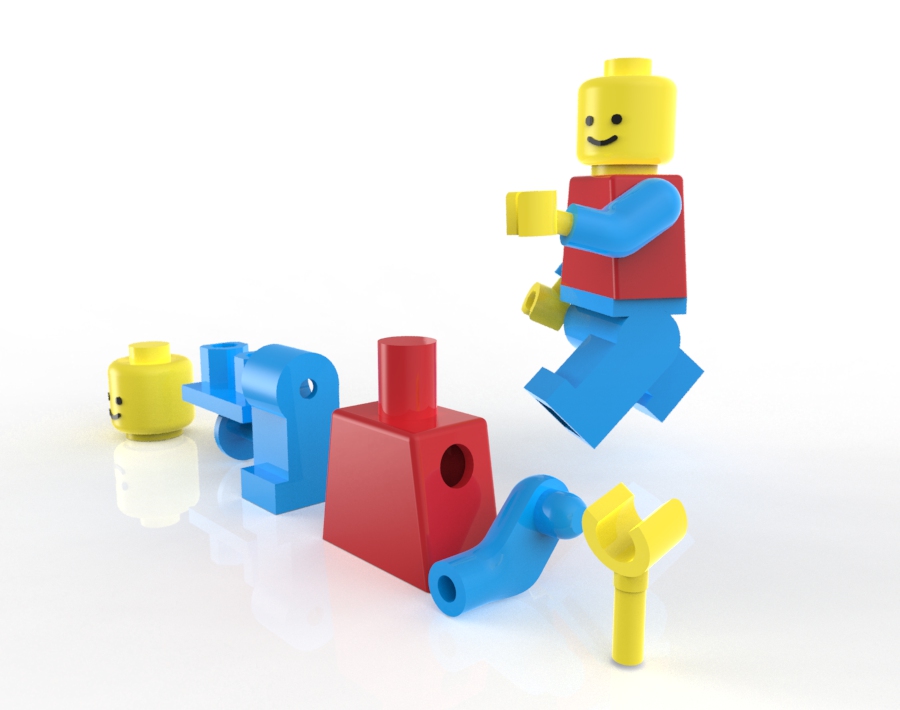
í Week 2 Challenge Part 3: Lego Figure
Using this Rhino File, assemble the Lego figure in the poses indicated in this document.
Keep the original model, and make a new layer (or set of layers) for each pose. If you finish early, use Keyshot to create a rendering of the assembled and posed figures.
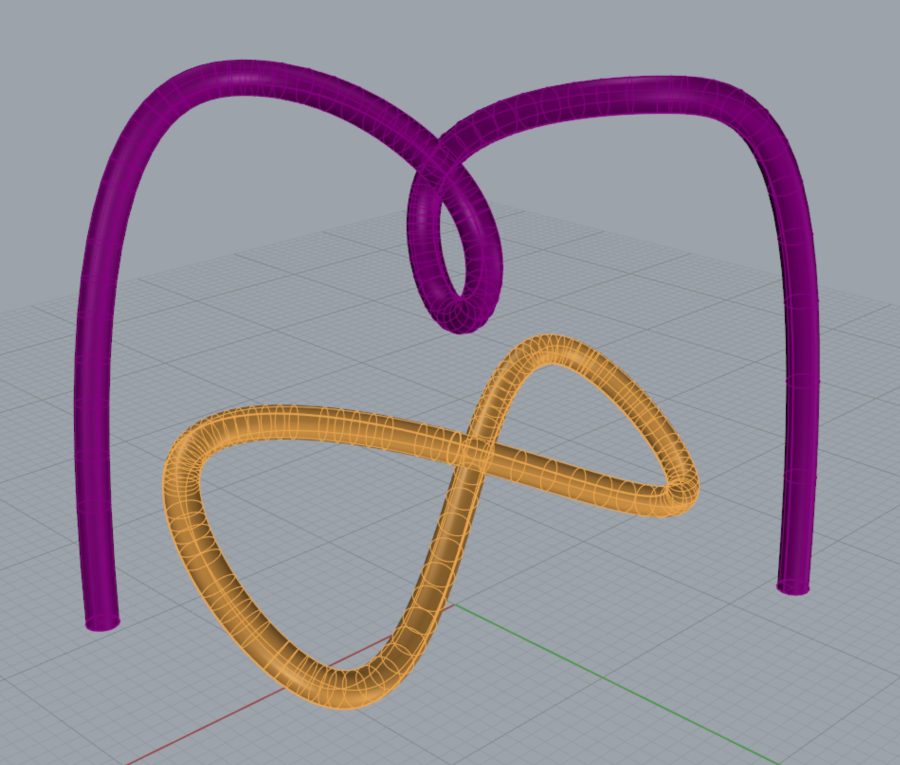
í Week 2 Challenge Part 2: Tracing in 3D
Fit a control point curve in the tubes included in this model. Use the exact number of points indicated by the layer name.
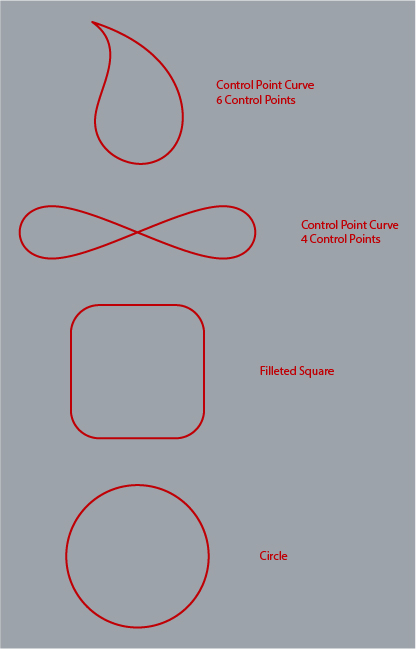
í Week 2 Challenge Part 1: Tracing
Use the image below to trace the figures shown in red. When indicated, use the drawing tool called out. Two problems have specific instructions regarding the number of points allowed.
-
Classroom
-
