- Â
å Tuesday, April 24th, 2018
B Updating Your MasterCAM file with New Geometry From Rhino
Some of you have asked: Is there a way to update the geometry in MasterCAM when I make changes in Rhino, like you can do with the Keyshot plugin?
There is not a plugin that links the two applications like Keyshot has with Rhino, but there is a fairly simple way to accomplish something similar:
- update the geometry you want to change in Rhino.
- In Rhino, select only the geometry you want to update and run the command “export” to save only this geometry.
- In MasterCAM, select the geometry that you would like to update. Delete this geometry by clicking the delete key (on mac you may need to press the “FN” key + delete. If this geometry is used by a toolpath operation you will get a warning, click OK. This is just warning you that a toolpath is using the geometry you are about to delete.
- Merge the updated geometry you exported in step #2. You may want to use the technique covered in a previous post to make sure the layer structure is preserved, but sometimes merging in new geometry messes up the layers.
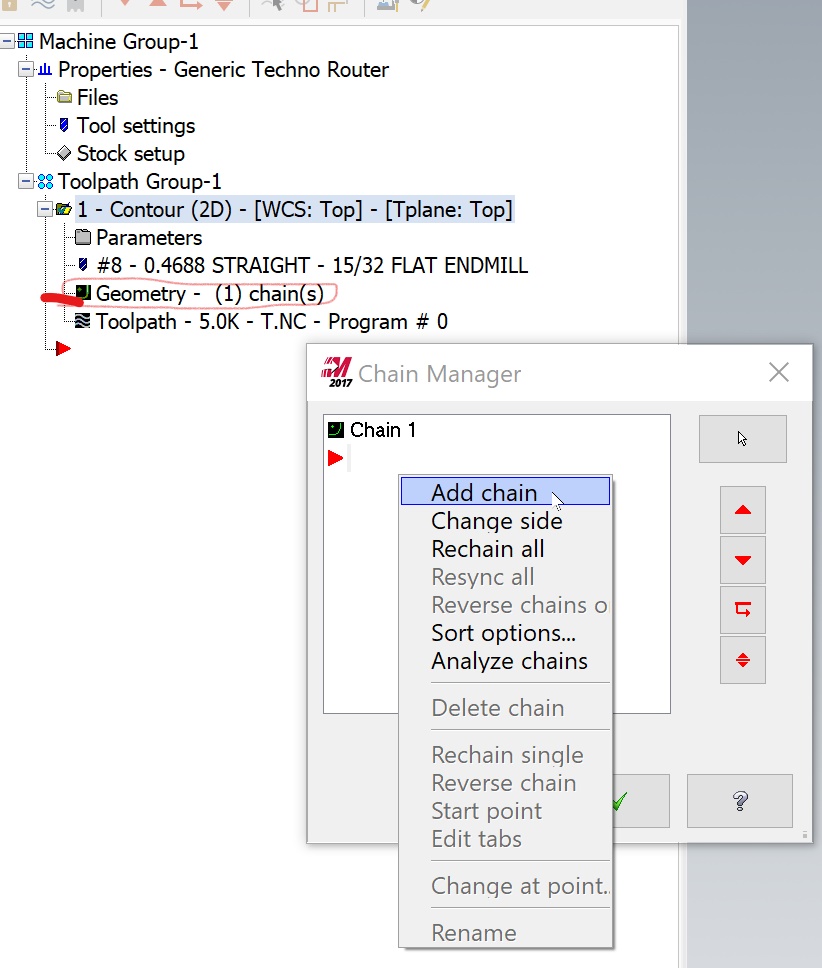
- Go into the operations that should use the updated geometry and add the updated geometry to this to the operation. To do this, expand the toolpath operation, click on the entry for “geometry”, then right-click in the “chain manager” window and pick “add chain”.
- When finished adding chains, click the green check to exit the chain manager, then regenerate the operations to calculate these changes.
You can use the same technique to add additional geometry or to otherwise change the geometry that is associated with a specific toolpath operation.

B Problem: Merging Geometry from Rhino in MasterCAM Doesn’t Include Layer Structure?
Some of you may be experiencing a problem where your layers are not preserved upon merging from Rhino into MasterCAM. Here is the workaround to solve this problem:
- Make sure you “export” from Rhino only the geometry you need for your work in MasterCAM
- go to File>Merge in MasterCAM, browse to the file you want to merge, select it, and click “Open”
- One the left side of the MasterCAM application you will see the Merge options. Click on the check box for “Use current attributes” to turn this option on, then click on it again to turn it off
- if you look at the “Levels” panel, you can verify that the layer structure is preserved – you should see the named layers from Rhino with the appropriate number of objects per layer.
- Click on the green check symbol to complete the merging of geometry

( Tool Library with 15/32 bit
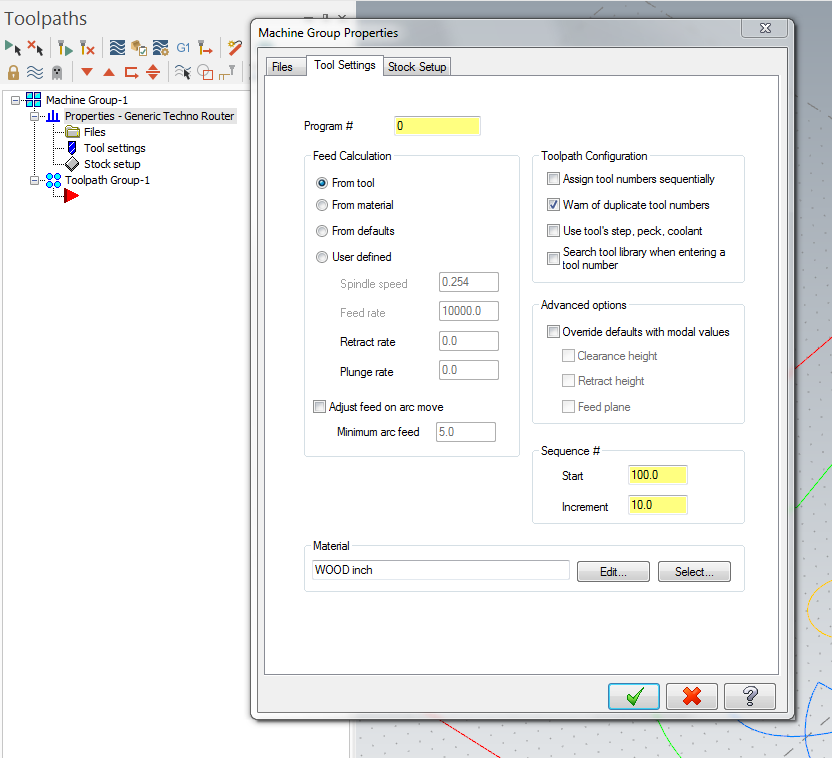
Sorry we did not post this sooner, but you can get the tool library with the 15/32 bit below. You will see that this tool is tool #8 in this library. You should go back into your operations and choose this tool. You should also make sure that your tool settings are not set to “assign tool numbers sequentially”. If you do have it set to assign tool numbers sequentially, the first tool you select will be called #1, regardless of which tool it is in the library. This will cause your part to cut with the wrong tool. See the image below for a reminder where you access this option.
http://3d2018.christopherspecce.com/wp-content/uploads/2018/04/BANK_TOOLS_2015PlywoodBit.zip
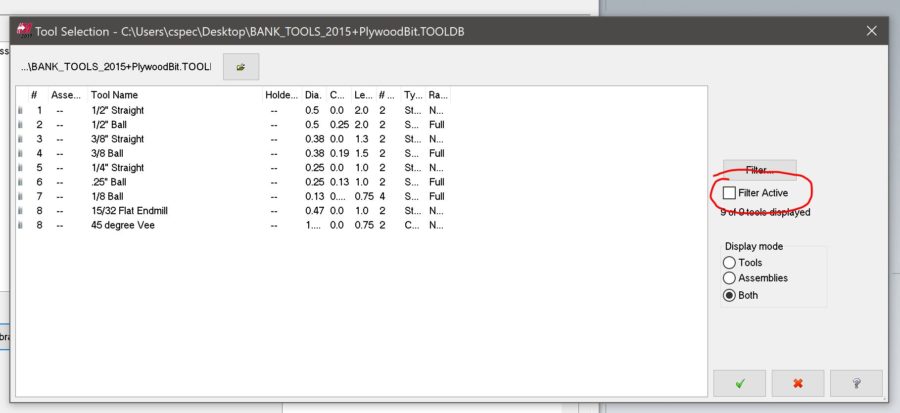
If for some reason you don’t see this tool as an options from the library, be sure to uncheck the option for “Filter Active”
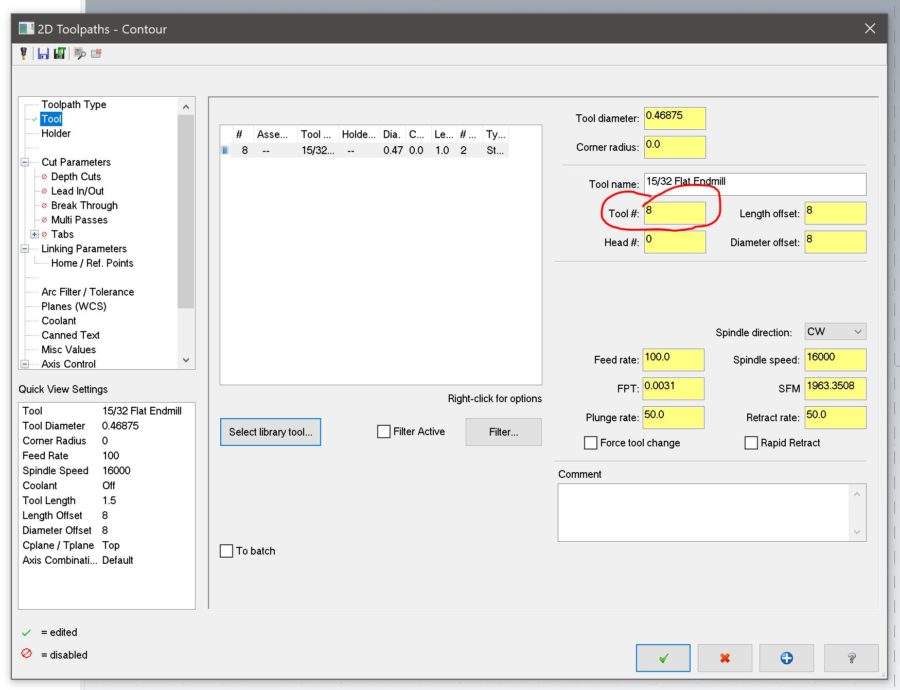
If you have the correct tool – “15/32 Flat Endmill”, but the tool number is wrong (maybe assign tool numbers sequentially was checked), you can just go in an change the tool number:


