In order to 3D print a model of one of your glasses, you will need to export it as an .STL file.
To do so you can follow these steps from Rhino:
- make sure the object is a solid. You can run the command “What” and if this tells you that the object is “closed” it is a sold. If it does not say it is cloed, you can run the command ShowEdges – this will allow you to display “naked” edges (edges that are not connected to another edge). If your model has naked edges, these are the edges that are open. If the opening is very small, the 3D printing software should be able to process your file successfully. The lab also has software that can “heal” small openings.
- Select the object, and then run the command “Export“. This will allow you to save only what you have selected.
- For the file format, choose .STL. Name your file and include your last name for easy reference in the 3D printing lab. Click export.
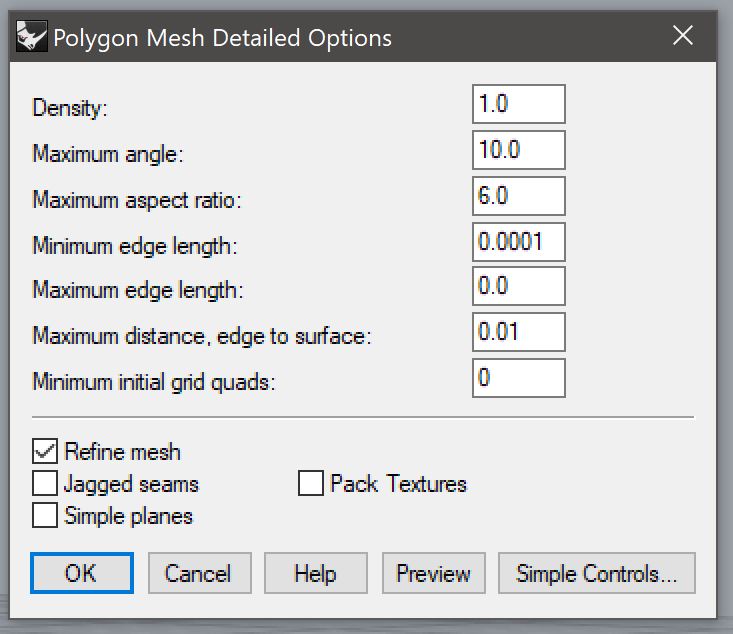
- a simple control dialogue will appear. On Windows, look for the option for “Detailed Controls”, on Mac you will see a little downward facing triangle. Use the settings shown below to ensure your model translates to a high resolution print
- Density: 1
- Maximum Angle: 10
- Maximum Aspect Ratio: 6
- Minimum Edge Length: .0001
- Maximum Edge Length: 0
- Maximum Distance, Edge to Surface: .01
- Maximum Initial Grid Quads: 0
- Refine Mesh: On
- Jagged Seams: Off
- Simple Planes: Off
- Pack Textures: Off
- You can click “Preview” to see how your model will be translated to planar polygons. Unless something looks really off, you can proceed by clicking “OK”
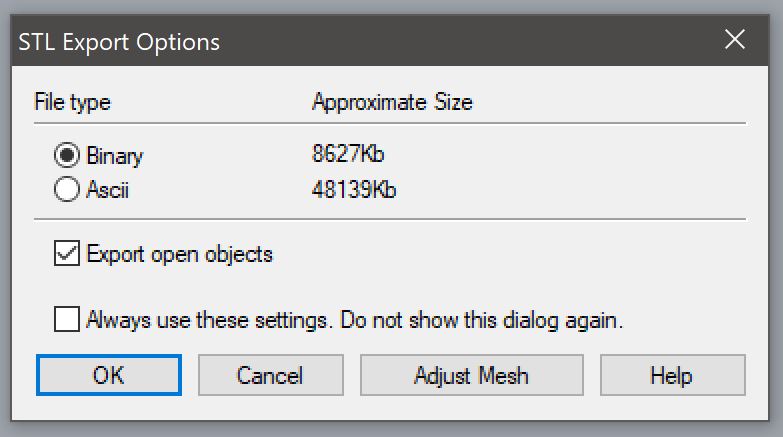
- In the next dialogue box, set the file type to binary and check the box for “Export Open Objects”, then click “OK”
Here are some screen shots showing the settings described above:


This file is now ready for 3D Printing. The monitors in the 3D printing lab in Bank building can you help you with the next steps.
b
